Showing posts with label bows. Show all posts

13 August 2016

Sheer Black French with Silver "Dagger" Accent, and I'm a Flippin' Fashion Designer Now

When life gives you lemons, make lemonade add tequila and salt and have a party :D

When life gives you a broken corner, file that shiz into a point and roll with it.

(click to enlarge)

I kind of love that pic. Read on for more details!

28 July 2016

Pink Holo French Tips (aka: Menchiecure!)

Hello my friends!

I got a huge smile this week! A friend I've recently met through an online game (PS, it's Ingress, the Pokémon-Go-before-Pokémon Go-was-a-thing game) told me that he met a fan of this blog! So if you're reading this, hi Sam, and yes I will totally do your nails sometime if you like--hit me up :D

This week, I'm happy to be rocking a French manicure again. I love the style, but my nails are usually too stained for me to feel OK about it, at least not without some colour-correction (hint: the purple OPI Sheer Tint polish is excellent for cancelling out yellow tones!), but due to the mini-hiatus I took recently, my nails are pretty much back to normal. So I'm going to show you the gorgeous polish I picked up a while ago--Menchie The Cat, a collab with Starrily and Simply Nailogical!

(click to enlarge! DO IT)


Rest is after the jump, because as is usual with my holo manis, I took waaaaay too many pics!

04 May 2015

Zebra Stripes & Bows

Hello! The last two weeks have been insane on my end! But I found some time for nail art, and did this relatively simple design I've had on my mind :)


The base is OPI My Boyfriend Scales Walls, topped with a coat of OPI Happy Anniversary! for some pretty shimmer. The stripes are painted on with my black Stripe Rite striper, and then the little bow is from Born Pretty Store :)


I hope you like this one! I'm really enjoying it.

Thanks for reading today! My schedule has calmed down now, so I should be able to post with a little more regularity. See you next time! xoxo

15 February 2015

Valentine's Day 2015 - Gradient Glittery Tips & Bows

Hello! Today, of course, I have my Valentine nails :)

This design is heavily inspired by one of my favourite YouTube artists--her channel is now called ArcadiaNailArt, but her old channel is IndigoNova1, and this video is beautiful. I used the same idea, but in seasonal colours, plus some handpainted bows!


19 December 2014

Christmas Bows Feat. Dragonfly

Hiya! I'm super tired, so let's get right to it :) I have another Christmas mani for you, featuring another of my new piCture pOlish shades--Dragonfly by Lucy's Stash!

Outdoors in sun

23 October 2014

Glowsticks & Glitter

Hello! It's getting warmer here, and with spring comes hay fever. I've been feeling under the weather, so sorry for the long time between posts. But in celebration of the sunshine, and to cheer myself up, I've been wearing neon nails, plus my new Born Pretty Store bows!

Outdoors in sunlight

So simple, yet so fun! Click the jump for the details!

05 June 2014

Bright Neon Bows

Good day, dolls! :)

Today I wanted to do something bright and happy and fun. I've been itching to paint bows... and I have not used orange in a nail design in a while, so this happened!


29 September 2013

Nubar Royal George Blue - Nails fit for a Baby Shower

Good day! It's finally a nice sunny day over here in my little corner of the world, and I can't wait to get out and enjoy it. Autumn is approaching, and it's that perfect combination of warm and sunny but with a crisp cool breeze. <3

Before I start doing fun fall manicures, I wanted to show off some swatches (with simple art) of the newest polish in my stash: Royal George Blue by Nubar!

d'awww. It matches my blog!

Nail-It! magazine graciously sponsored a giveaway of this special polish on their Facebook page last month. I was lucky enough to be a winner! I didn't even realise I had won until a little unexpected box appeared on my doorstep. I was so excited when I saw what was inside!

Royal George Blue is a limited-edition colour that Nubar created to celebrate the birth of the British royal baby to Duchess Kate and Prince William. I think it's just perfect: soft, pale pearly/frosty blue with small bright-blue glitters. It builds up to this opacity nicely, although application was a bit difficult. I was able to get this with two veeeeery careful coats, but if you mess up in the slightest you will have dragging and bald spots. A third coat in this case would solve it, and it isn't too thick, so it's not bad at all! It's a frosty shade and the brushstrokes show up a little, but I don't mind... unlike a lot of nail bloggers, I actually sort of like the effect.

I thought it would be a perfect colour to wear to a baby shower for a little boy, so I added a little bow sticker from a pack I got at Essence, and then a small coordinating blue rhinestone in the centre of the bow. Topcoated with Sally Hansen Insta-Dri #110 Clearly Quick.

Sorry for the awkward three-finger pics. I broke the index nail and a put a falsie on it, which looked OK in person but totally weird in these close-up shots, so it got cropped out.

See the depth in those glitters? The ones on top are reflective and the ones below look matte-blue. It's so interesting!

And a pic with my newest phone case. Not the best lighting, but the glitters picked up the pretty satiny royal blue of the case. A posh prop for a posh colour :D

Could have used another layer of topcoat, I see. Ah well. I hope you liked these swatches! If you'd like to own this pretty, it is still available for only $5! (They only come in the 7ml/mini-bottle size.)

Have a great Saturday! xoxo

21 December 2012

Christmas Dots & Bows

Good evening, my lovelies! I hope you aren't getting tired of Christmasy designs yet, because I have two more after this one!

Sparkly red and green, polka dots and bows. Feminine and seasonal!

The base is two coats of Zoya Nidhi, and I was surprised at this polish. It has a squishy jelly-ish look to it--you'd think it'd be sheer and take loads of coats to be opaque, but it looked okay in one! I did two just to make sure I didn't have thin or bald spots. Cranberry-ish holiday red with shimmer that seems to change colour--depending on the light I've seen the glassflecks look silvery, gold, red, even blueish-green! Great shade.

The dots are Zoya Ivanka, my favourite shimmery/sparkly green. I freehanded the bows on--first the basic outline shape with Revlon #925 Gold Coin, then dabbed in the white definition with my white Stripe Rite polish.

Darker, but you can see the bow better here :)

I love this photo... and I will never get tired of staring at Ivanka, srsly *_*

Not the clearest pic, but, posing with the extent of my Christmas decorating--a little bow on the door-knocker. Haha.

That's all for now! Provided the world doesn't actually end tomorrow, I'll have a couple more holiday designs up soon before we head into the new year. Have a great Friday! xoxo

14 October 2012

Challenge Day #23: Inspired by a MOVIE

Howdy y'all! I'm back! Got in yesterday and of course, the first thing I had to do was change my nails. For my trip I wore a really cool polish that I did take pics of and will show you sometime. But for now, I'm going to show you the movie-inspired manicure for day 23:

Wizard of Oz, of course!

This was so fun to do! I have a good friend at work who loves the Wizard of Oz, and loves nail polish and reads my blog! She also happens to be like the sweetest person ever, so these are for you, miss Rachel :D

I used quite a few polishes for this, so I'll just go down the list:

Thumb = Dorothy's blue gingham dress: Base colour is Ulta Snow White, and the blue stripes were painted with Revlon Colorstay #170 Coastal Surf. I also dotted in a bit of Soulstice Spa Monterey at the 'junctions' to make it look more like gingham, darker where the lines meet.

Index finger = the ruby slippers: Two coats of China Glaze Ruby Pumps (what else?) over one coat of China Glaze Adventure Red-y. I have decided it's the perfect layering combo, look at that rich red colour and the sparkle! Love.

Middle finger = the Wicked Witch's feet sticking out from under the house!: Started with Ulta Snow White, then applied some thin stripes of tape to block off the white and added Wet N' Wild Black Creme. I then peeled off the tape, let it dry, and painted on the little french-tip for the shoes in the same colours as the index finger. Finally I added a few little red rhinestones for the bow.

Ring finger = the Yellow Brick Road: I used two Sally Hansen Xtreme Wear polishes for this: base of Mellow Yellow, and then used a sponge to dab on a bit of Sun Kissed (a medium creamy orange), but just a little for dimension. I then added a coat of Essie As Gold As It Gets, because, sparkles. Last, I used my black Stripe Rite striper polish to paint in the brick pattern.

Little finger = the Emerald City: This one was easy. The base is Sally Hansen Xtreme Wear in the colour Emerald City! I really wanted to leave it as is, but the rest of the nails were sparkly, and ever since I got Zoya Ivanka I can't seem to wear Emerald City without it, so I added a thin coat of that on top.

Annnnddd of course sealed it all with Cult Nails Wicked Fast topcoat.

Shiny! Ruby Pumps is so delicious. I could just eat it. It's perfect. One of my favourite polishes of all time. Also, please ignore that ugly cut on my thumb. Couldn't crop it out like I did with the first pic D:


"A doorknob, really?" Yes, I liked this shot, get over it. The red looks so rich and shimmery here I had to post it.

That's all for now! Hope you all enjoyed this one. I had a lot of fun painting it (although my left hand came out a LOT better than the right... I didn't even take photos of it, the yellow brick road looks like it's been through an earthquake). Join me next time for my book-inspired nails, and until then, have a great weekend! xoxo

16 September 2012

Challenge Day #12: STRIPES

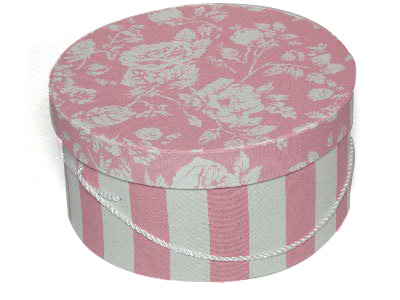
Ohai. Eek, been so busy! But not too busy to make awesome nails happen. Next challenge on the list was stripes :D I love vertical stripes on nails--makes them seem longer and more narrow--not that my nails aren't already narrow. Ridiculously tiny, actually. Nevertheless, I love the look, and I wanted to do some sweet pastel colours and stripes and bows, like the old hatboxes of yore:

(image found on usbox.com)


I've actually done a similar nail design to this, with the pink and white, but I went for different colours this time:

Indoors, no flash. Look at that shine! :)

I wore these for days, they are so cute! I started with two base colours. Soulstice Spa's Kona is a light teal creme, and I painted the pinky, ring finger, and thumb with that. The  yellow is my go-to yellow, Sally Hansen Xtreme Wear in Mellow Yellow, and I used it for a double accent on the middle and index fingers. It's just such a great shade, and unlike most yellow polishes, doesn't take 293053974 coats to be opaque!

I then used my white Stripe Rite striping polish to freehand the vertical lines. This takes some practice, and mine are far from perfect, but I went slowly and held my breath (haha... no, I'm serious) and managed to get decent lines even on my right hand! The bow is a little sticker, I got it from the Essence store last time I was in Germany. The pack is called Sweet Romance, and it has all sorts of cute bows and hearts. I just added one to each index finger. Then a nice thick layer of Seche Vite topcoat, and done!

Same pose, but with flash. The yellow looks a bit more colour-accurate here :)

The weather was a bit dreary the whole time I had these on, so no sunlight pics for you... But I did get a silly one at work! I noticed that my nails matched the origami ninja star I made ages ago, so decided to pose with it:

I made about a jillion of these little stars :D

Guess that wraps things up for this post. Join me next time for day 13, animal print! Gonna be fun. Or wild. We'll find out soon enough... See you all next time! xoxo