Showing posts with label stripes. Show all posts

15 April 2016

25 December 2015

Christmas Day 2015 | Born Pretty Store Decals :)

Merry Christmas, everyone :)

(click to enlarge)

I've had this idea all month! The tips are done with a white base (OPI My Boyfriend Scales Walls), red acrylic paint for the stripes, and a gold glitter striper for the frame around it. This part took ages, and the stripes aren't perfect, but considering how curved my nails are I think it came out pretty nicely. They look much better at a real-life size and normal distance :)

The stickers are from--you guessed it--Born Pretty Store! They aren't actually made of metal, as the description on the site suggests. They are, however, nice-quality stickers with pretty metallic gold accents and details. And they're the perfect size for this, even on my tiny nails! Someone with normal sized hands would have some breathing room around the cuticle ;)

This is all sealed in with Seche Vite for shine and protection.


I hope you have/had a lovely Christmas day if you celebrate it, and if not, that you've enjoyed some time off work and a lovely holiday season with family and friends.
(And of course, if you want to pick up these or any other great nail or beauty supplies at Born Pretty Store, don't forget to use my discount code CITYG10 to get 10% off your order, which ships free anywhere in the world!)

See you next time for some pretty New Years nails! :D xoxo

28 October 2015

Rustic Gold Stripes

Halloween is nearing, and this manicure has nothing to do with it :P

I've had so much going on lately that I haven't been able to post as frequently as I used to, nor have I been able to do all the themed manis I wanted! Today's design is, instead, a rustic, gilded sort of look that reminds me of old photo frames or tarnished jewellery:


18 November 2014

Elegant Dragonfly & Stripes: Born Pretty Store Nail Charms

Ciao a tutti! Boy, it's getting warm here in northeastern Australia. It was about 40C yesterday. Summer is fast approaching! It means I'm sweating my bum off, but it also means I have lots of bright sunlight for showing you the third review item Born Pretty Store sent me: these beautiful dragonfly charms!


(The website says they are bowknots, which I can kind of see, but I think they look more like dragonflies, so that's what I'm calling 'em!)

The charms are about 1.5cm across the wingspan, and 1.7 from the top of the pearl to the end of the diamante tail. They are thin and delicate, but still seem well-made. The tail is free-swinging, and I was able to bend the wings gently to fit more around my nail. I wouldn't recommend doing this very much, because I think they would break off eventually.

I didn't realise they had the little loop on top when I saw them on the website. I think I will actually wear these more often by attaching a hook and wearing them as earrings! Because as gorgeous as they would be for a special occasion, they are a bit on the large side for everyday wear on the nail.

As a backdrop for the dragonflies, I used two coats of Zoya Hudson, a shimmery lavender from their Spring 2014 collection, and a white striper to add some vertical lines. That was pretty, but I wanted even more shimmer, and to soften the contrast between the purple and white, so I added a coat of L'Oreal #802 The True Diamond (one of their "Magic Topcoat" polishes). Seche Vite sealed that in, and then a drop of nail glue adhered the charm! (If you have access to it, a drop of acrylic would definitely keep it in place as long as you wanted!)


I feel so pretty and dainty with these on! Makes me want to attend a wedding or fancy dinner. It would certainly be a conversation-starter!

You can find these charms here, as well as so many other beautiful nail art supplies. As usual, don't forget to apply discount code CITYG10 for 10% off any order!

Thanks for stopping in today. Have a lovely day and I'll see you next time! xoxo


*product sent for review--the experience described above is my honest opinion and was not influenced in any way by the retailer*

08 October 2014

Not Like The Movies, Part 2 (THE SEQUEL)

Sequel... movie... see what I did there?

Hiya! Today's post is a quick one to show you the little skittlette mani I did over the swatch from yesterday.


I stamped the middle nails with Wet 'N Wild Black Creme and Bundle Monster plate BM-414. It's one from the user-created set last year, and in honour of the 2014 set coming out soon, I thought it'd be a great time to use one now! The relatively large areas of black caused those little wavy lines in the stamped image, which really don't show up at all IRL--just in these blown-up images. It's kind of a neat effect, though!

Over the small nail, I used two coats of BYS Glitter Crystal, a sort of chunky silver holo glitter, and then a coat of China Glaze Fairy Dust over that. Fairy Dust is, of course, a finer silver holo. This is my new favourite glitter layering combo--they go so well together and make any base colour look amazing! I used the same method for just a stripe on the thumbnail, and used a black striper to create the lines down either side and pull this look together.

More Seche Vite, and woo! I have a total of ten coats of polish on my smallest nail, base and top coats included. LOL!


A slightly blurry one, so you can see that gorgeous sparkle :D

I have a surprise coming up next time... so stay tuned for that! xoxo

29 September 2014

#31DC2014 - Day 29 - Inspired by the SUPERNATURAL

Hello my beauties! Time for probably the weirdest prompt of the 31-day challenge... "inspired by the supernatural".


I had to think about this one for a while, and at first I thought I'd do something based on the video for Katy Perry's ET/Supernatural song. I did watch it, and it did inspire the basic colour scheme, but I ended up doing Alienware nails!


If I were a PC gamer (I'm a console peasant, come at me bro), I'd lust after Alienware computers more than I already do. For those of you who don't know, they're the name in gaming rigs. And the little alien face I recreated on my index finger is their logo :)

I applied three thin coats of Cult Nails Deal With It on the small finger and the thumb, then taped off a stripe near the tip and covered it with Wet 'N Wild Black Creme. This is meant to mimic the look of their gaming laptops, which are black but have a metallic neon strip of colour around the outside. I should have used matte topcoat over the black, as their machines are generally matte. Oh well.

Black Creme was the base for the other three nails, and I used white acrylic paint to create the alien face. For the galaxy nails, I sponged on the white paint as well as Deal With It and Soulstice Spa Kona, a light icy/aqua blue. I added a bit of the glitters from Orly Mermaid Tale (green holo hexes) and OPI Pirouette My Whistle (white hexes and silver microglitters). Finally, more of the white acrylic paint to add a few stars, and Seche Vite topcoat finished them all off. I'm quite happy with the finished look!


Boo, this one came out a bit blurry. But you can see the warm glowy quality of Deal With It. I love this polish.

I hope you like these! I'm not even a huge Katy Perry fan, but I've had that song stuck in my head for hours after watching the video earlier. I did this all for you, my dear reader, so you'd better appreciate it ;) hehe. See you tomorrow for more! xoxo

27 September 2014

#31DC2014 - Day 26 - Inspired by a PATTERN

Hullo! It's late here and I'm tired, so let's get right to it! Day 26--inspired by a pattern. I chose to paint my family's tartan :)

Indoors with flash (and my scarf of the same pattern) :)

I used three Revlon polishes for the tartan pattern: Revlon Red, Royal (blue), and Posh (green). I used the flat brush and the striper from this set from Born Pretty Store for this. It looks really wonky up close--this is actually the first time I've used that long striper!--but from a normal distance it looks really cool I think :D

The Scottish flag is the same blue, Royal, and then Orly Pointe Blanche for the cross. I should have used acrylic paint. Would have had neater lines. But oh well. All sealed in with KBShimmer Clearly On Top.

Outdoors in indirect sun
Same as above. I didn't have much sun for these photos. Which is fitting, since there isn't much sun in Scotland either ;)

This is another one I really wish I could wear longer--I love the look and would be proud to rock it for a few days! But, the challenge marches on. See you tomorrow for more! xoxo

26 September 2014

#31DC2014 - Day 25 - Inspired by FASHION

Bonjour! Day 25 of the challenge is "inspired by fashion". Here's my nail look!


I think I am fairly stylish in my own way, but I am not trendy or fashionable, and I do not care about designers and brands and such. So I did a simple Google image search for "fashion", and found inspiration on the very first page of results!

(image found on trendingtrendsnow.com)


This image is from Tumblr. I do not know how to Tumblr. I looked everywhere trying to find a source, but there is no artist name here and I couldn't even see who uploaded it. A Google image search was also fruitless. I am more than happy to give credit to the artist if I can figure out who it is! Any help from you lovely people on this topic would be very much appreciated! (Update: didn't find an artist, but traced most instances of it to the URL above, so I'm sticking with that!)

Anyway, I very much fell in love with the look on the far right, so I did half moons with Sally Hansen Xtreme Wear Mellow Yellow, and painted the rest of the nail white with Orly Pointe Blanche. Then I added vertical stripes with my black Stripe Rite polish. Finally, some pretty half-pearls along the line, and Seche Vite to top it all off.

Indoors with flash
Outdoors in sun (it's finally sunny again!)

I wore these out for cocktails with a friend (hi Suzy!) and, by total coincidence, my nails matched the decor in the place! I'd never been there before, but look at the pattern on the seats...

Grainy phone pic, but I couldn't NOT take one

So you know, maybe it was the strawberry-basil martini talking, but I felt pretty sophisticated. ;)

I hope you like these--I sure do! See you next time xoxo

12 September 2014

#31DC2014 - Day 12 - STRIPES

Hello dears! :) For day 12 of the challenge, I have done some textured stripes. I don't want to take them off!

Outdoors in sun

The base is this nice coral-orange creme, Call Me Gwen-ever, by OPI. Two smooth, buttery coats covered perfectly. I'm still on the hunt for a perfect coral polish (any suggestions??) but this is one I was happy to add to my collection recently.

Indoors with flash, holding Call Me Gwen-ever

I taped off some stripes of varying sizes with striping tape, and added OPI Jinx, a Liquid Sand textured polish of the same shade. I really love the result!

Also with flash, holding Jinx

No topcoat, since I wanted to keep the texture of the stripes.

I'm having a lot of fun with the challenge so far this year! It's been great seeing all the manis everyone's done. As a reminder, here is a list of the prompts:

(credit to Chalkboard Nails for the image)

Even if you haven't participated up to this point, you still can hop in any time! Just share your manis on all your favourite social media sites, with the hashtag #31DC2014. We'd all love to see them :D

Come back tomorrow for some animal print. rawr! xoxo

11 July 2014

Random Holoness with Color Club!

Hello! Guess who messed up the scheduling for this post and made it go out late?


Just kidding, it was me. :P

These nails are pretty weird, though. It started as "I want to wear some holo, I'll just grab the first one I see!" It turned out to be Color Club Kismet, their light limey-sagey green Halo Hue. And then...it got crazy.


03 July 2014

Happy "Good Time To Be In North America" Week!

Hiya! Happy Canada Day & Happy July 4th! The USA and Canada are so close together, and so are their big celebration days, so I decided to combine them into one fabulous red, white, and blue manicure:

Outdoors in shade

10 April 2014

Baby Pink & Grey Skittle

Aloha, boys and girls :)

The weather here in sunny Oz has started to get just a tiny bit cooler as autumn settles in. I feel like today's manicure sort of captures that idea, and I'll explain why!


08 April 2014

Stripey Half-Moon: Inspired By a Towel

Bonjour!

So... I have this towel. It has stripes.


I decided to paint my nails to match this towel. Because I can.

I am still getting the hang of my lightbox.

11 March 2014

More St. Paddy's 20-fo-teen: Mallard Tartan Tips

Hello hellooo! Time for more St. Paddy's goodness:

Wow, these look so much better in person and at normal size >.>

Right! So... my idea was to do a tartan look with the colours of the Irish flag. I kind of succeeded. The base for these tips, in my favourite french-tip/half-moon hybrid (French moon?), is the bottle shown above--piCture pOlish Mallard. Such an awesome dark green with an olive shimmer plus copper and green flakies! The tartan pattern was painted with a thin striper brush and white acrylic paint, Sally Hansen Insta-Dri #460 Snappy Sorbet (the orange), and Stripe-Rite gold glitter.

I love Mallard, but I kind of wish I'd used a lighter, brighter green. Also a more true orange rather than Snappy Sorbet, which leans a bit coral, especially over a dark base. I like this look, but it doesn't scream Irish the way the image in my head did. I attempted to rectify this with a cute little shamrock on the middle fingers, which was done with a dotting tool, detail brush, and Essie Shake Your $$ Maker. It was cute, but I thought it needed more definition around the edges, so I attempted to do a sort of outline with a green Sharpie and managed to mess that up too. Argh! They looked neater before the last step, but I couldn't get it off, so I just gave up and topcoated with Seche Vite.

Smell that? It's the aroma of FAIL


I know the end product doesn't look too bad, really--just nothing like what I had in mind. Still, I'm glad I did this design. I love the tartan look, and definitely need the practice doing straight lines. My hands are fairly steady and vertical lines are usually okay, but horizontal ones are awful! Oh well. Every manicure can't be a favourite, now can it? :)

Come back next time and I'll have something nicer for ya. Thanks for reading! See you soon xoxo

25 October 2013

Silver, Yellow, & Black

Hello hello! Today I have a quick post featuring a manicure I wore a couple of weeks ago (before trimming my nails down). It's a colour combination I'd had kicking around in my mind for a while, but I wasn't sure how I wanted to put it all together. Then one day it came to me!

eww, tip wear. Damn you, topcoat.

I knew I wanted to do a silver base with yellow on top. Here, the silver I used is two coats of a no-name from Hot Topic. I don't think they sell this brand anymore, but it's the kind with the bottles like this (image courtesy of Steph's Closet). It's a very cool metallic-foil shade with just the right amount of sparkle. I want a car in this colour!

The small finger is painted with white + two coats of Orly Glowstick. Best neon yellow ever. It's SO BRIGHT and I'm glad it photographed properly here.

I then used yellow acrylic paint and a thin striping brush to paint on the random stripes. I wanted something kind of retro and laser-light-esque. The black was added at the end when I felt it just needed a little something else. The silver star-shaped stud is from this wheel I got at Born Pretty Store. Before applying these, I press them against a pen and wrap it around to gently bend it into a curve that will fit perfectly against my nail. This way they stay longer and aren't catching on everything!

It's all sealed in with Seche Vite, which unfortunately caused quite a bit of shrinkage with that silver.

Sort of a dark awkward pic, because I wanted to show how much that neon yellow pops! It really lives up to the name Glowstick (though it does not actually glow in the dark).

I hope you liked this one! It's going to be a busy weekend, but I hope I can get another post in soon. Thanks for stopping by, and I'll see you next time! xoxo

28 May 2013

Alphabet Challenge: F is for... Four Exotic Ozotics!

Hello, my friends!

I couldn't wait for the letter F, because I have four special new polishes I'm really excited about--Ozotic duochromes! A special hello and thank you to the girls at piCture pOlish!

Of course, no way I was going to attempt to pick just one for this, so I did an easy yet really nice stripey pattern over black:

Shifty! Jewel-toned! Lovely :D

I will preface by saying that this mani looked so, so pretty in real life. They just shimmered and sparkled and caught the light and were always a different colour. I have to do a better job next time of capturing their true-to-life look.

They are, in order from cuticle to tip, Ozotic 502, 504, 503, and 505 (see, if you spell out the numbers, their names start with F too)--and I laid down a base of Wet N' Wild Black Creme first. I tried them alone, and they are lovely--sheer, softer, very nice--but the duochromatic-ness really comes out over a dark base :) Just look at these pics... the polishes look different at every angle!!

504 and 505 look very similar at some angles, and completely different at others :D

Odd angle, check. Fingers look like old-lady fingers, check. Awesome colour-shift, check! Can you believe these are the same polishes from the pic above?

Slightly blurry, very glossy... but it shows off well the shift :) ALL THE COLOURS!

I tried taking some underwater pics (got the idea from Amy Grace, who got the idea from Goose... have I ever mentioned I love the nail-blogging community?) and while I couldn't get what I wanted with them totally submerged, I liked this shot with the droplets!

So, yeah. Happy as can be to have these in my stash! As a side-note, the bottles themselves are really nice too. Smooth and thick and the cap is that soft, matte, slightly rubbery stuff that feels nice to the touch. They're posh!

I got some of the piCture pOlish Collaboration shades too that I can't wait to show off. SOON. And I will do better at photographing them ^^;

Until next time, my fabulous flowery fairy-cake-y followers! xoxo

22 March 2013

Delicate Stripes + Pearls

Good day my lovelies :) After all the blingy crazy St. Paddy's nails, I decided to go soft with some simple, delicate, feminine nails. And I've been wanting to use these half-pearls for ages... Although I discovered they're a bit too large to do what I originally wanted to--must acquire some smaller ones!--I did find a way to use them and it still look nice:

Baby blue, stripes, and pearls :D

I just realised this would be perfect for a baby shower if the baby were a boy. Haha.

Base colour is Essie Bikini So Teeny. It has a lovely subtle matching shimmer to it, but it didn't really show up in these photos. It's a really pretty periwinkle, though, as you can see. I just think "delicate" any time I see it :)

I then added the white stripes with my Stripe Rite striper polish. You may notice they sort of get thinner in the middle, and then fatter at the tips. Want to know why? Because instead of having a C curve that goes "under" like most people, my nails tend to grow upwards. Isn't that weird? The nail bed is straight, then it hits the free edge and starts angling upwards. So no matter what I do, there's sort of a "crease" there that makes it hard to do nice vertical lines.

Anyway, the last step was to add the wee half-pearls. I did two on the thumbs as well. They are sticky-backed pearls by a brand called Queen&Company; I found them at a craft store.

Sealed it in with some Seche Vite and was good to go. I took the next two photos with the new case I got for my Samsung Galaxy tablet--an old friend has an Etsy shop and does custom covers, and she made mine with some space-patterned fabric, perfect for a Galaxy! :D


I love this star-shaped button she used for the closure! It's a bit finicky to use sometimes but totally worth it.

Hope you enjoyed today's post! I'm curious, do any of you have the weird funky "inverted C curve" thing going on like I do? I need to do some research and find out if this is a thing. Haha. See you next time! xoxo

23 December 2012

Candy Cane Tips

Hello, friends :) Another quick post today--comin' at you from my friend's laptop today, so I apologise for not being able to crop/colour-correct the photos as well. No fancy editing programs here! But I wanted to show you my second-to-last Christmas manicure--candy cane French tips with "icicle pieces" :)

Festive and tasty, except not actually tasty. Ignore the smudge on my index finger >.< that was me being too impatient and changing shirts too soon after painting.

French tip was done with Ulta Snow White... Red candy-stripes were added with red acrylic paint and a small paintbrush. The gold stripe is Stripe Rite gold glitter. That wasn't quite enough--I wanted a frosty, icicley look, so I dabbed on a bit of China Glaze Luxe And Lush, mostly on the bare part, just sweeping a bit over the tips. Seche Vite topcoat sealed it all in--had to use a couple thick coats to smooth out those flakes, but totally worth it. I really like this one :)

Isn't this candy cane pen cute? The ink smells of peppermint as well :D

With flash, for maximum sparkly *_*

Hope everyone has a lovely weekend :) xoxo

16 September 2012

Challenge Day #12: STRIPES

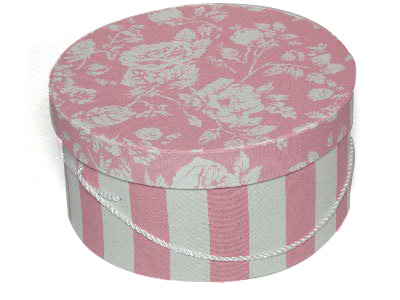
Ohai. Eek, been so busy! But not too busy to make awesome nails happen. Next challenge on the list was stripes :D I love vertical stripes on nails--makes them seem longer and more narrow--not that my nails aren't already narrow. Ridiculously tiny, actually. Nevertheless, I love the look, and I wanted to do some sweet pastel colours and stripes and bows, like the old hatboxes of yore:

(image found on usbox.com)


I've actually done a similar nail design to this, with the pink and white, but I went for different colours this time:

Indoors, no flash. Look at that shine! :)

I wore these for days, they are so cute! I started with two base colours. Soulstice Spa's Kona is a light teal creme, and I painted the pinky, ring finger, and thumb with that. The  yellow is my go-to yellow, Sally Hansen Xtreme Wear in Mellow Yellow, and I used it for a double accent on the middle and index fingers. It's just such a great shade, and unlike most yellow polishes, doesn't take 293053974 coats to be opaque!

I then used my white Stripe Rite striping polish to freehand the vertical lines. This takes some practice, and mine are far from perfect, but I went slowly and held my breath (haha... no, I'm serious) and managed to get decent lines even on my right hand! The bow is a little sticker, I got it from the Essence store last time I was in Germany. The pack is called Sweet Romance, and it has all sorts of cute bows and hearts. I just added one to each index finger. Then a nice thick layer of Seche Vite topcoat, and done!

Same pose, but with flash. The yellow looks a bit more colour-accurate here :)

The weather was a bit dreary the whole time I had these on, so no sunlight pics for you... But I did get a silly one at work! I noticed that my nails matched the origami ninja star I made ages ago, so decided to pose with it:

I made about a jillion of these little stars :D

Guess that wraps things up for this post. Join me next time for day 13, animal print! Gonna be fun. Or wild. We'll find out soon enough... See you all next time! xoxo